
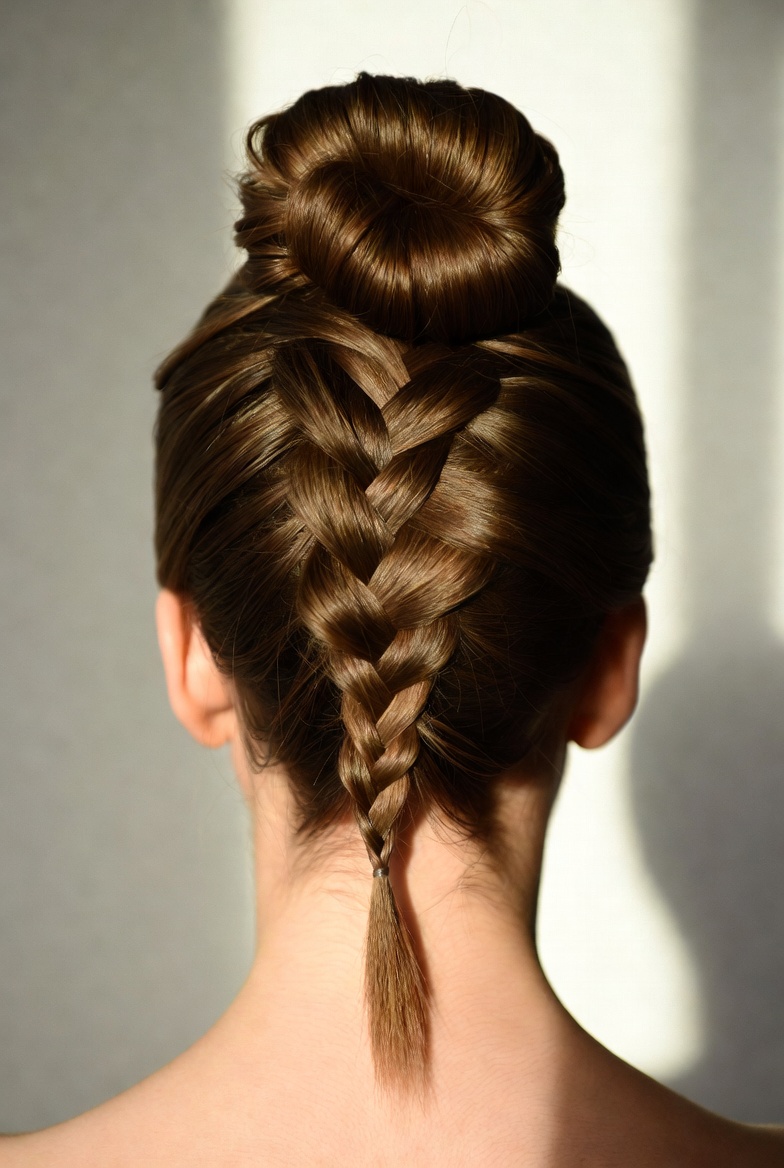
French Braid into High Bun: A Chic and Versatile Hairstyle GuideThe French braid into high bun is an elegant, polished updo that combines the classic sophistication of a French braid with the practicality and lift of a high bun. This style works beautifully for everyday wear, workouts, school, formal events, weddings, or prom. It keeps hair neatly secured while adding texture and visual interest, and it suits medium to long hair (with or without extensions for extra volume).The most popular version is the “upside-down” or “French-up” method: a French braid starts at the nape of the neck and travels upward into a high bun at the crown. Other variations use a high ponytail base with a French braid wrapped around a hair donut for a fuller, more structured look.What You’ll Need
- Brush or comb (paddle brush works well)
- Hair elastic / hair band
- Bobby pins
- Optional: mesh hair donut (for extra fullness and shape)
- Optional: medium-hold hairspray, texturizing spray, or light gel for flyaways
- Optional: hair accessories (bow, flowers, or decorative pins)
Step-by-Step Tutorial: Upside-Down French Braid into High BunThis method creates a seamless braid that flows directly into the high bun and is beginner-friendly once you get comfortable braiding upside down.
- Prep the hair
Brush thoroughly to remove tangles. For better grip, work with second-day hair or lightly mist with texturizing spray. Decide on the height of your bun (usually at the crown). - Section the front
Part or section the hair from just above one ear across the top of the head to just above the other ear. Clip or tie the front section out of the way for now. - Flip and start the French braid
Flip your head upside down (you can lean over a bed or couch for comfort). At the nape of the neck, take a section of hair and divide it into three equal strands.
Begin a classic French braid: cross the right strand over the middle, then the left strand over the new middle. As you continue, add small sections of hair from each side into the outer strands before crossing them over. Work the braid upward toward the crown, keeping tension even but not painfully tight. - Finish the braid
Once you have incorporated all the available hair from the back and sides and reach near the crown, stop adding new hair. Continue with a regular three-strand braid for a few more inches, then secure the end with a small elastic. - Create the high ponytail and bun
Flip your head upright. Release the front section and smooth it back. Gather the front hair together with the end of the braid into a high ponytail at the crown. Secure with a hair band.
To form the bun:- Twist the ponytail and wrap it around the base, tucking the ends under.
- Or use a mesh donut: pull the ponytail through the donut, spread the hair evenly around it, then wrap any remaining length and pin.
Secure everything firmly with bobby pins, hiding the ends and the elastic.
- Final touches
Gently tug on sections of the braid or bun for a softer, fuller look if desired. Smooth flyaways with a bit of hairspray or gel. Add a bow or accessory if you like.

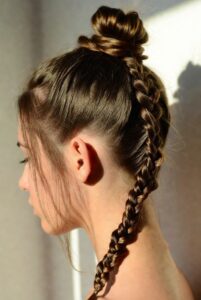
Alternative Method: High Ponytail + French Braid Around a DonutThis creates a more structured, rounded high bun with the braid woven directly into it (popularized by tutorials from Missy Sue).
- Brush hair into a high ponytail and secure with a hair band.
- Optional: place a mesh donut over the base.
- Leave out a small section of the ponytail, then spread the rest around the donut.
- Use the left-out section plus hair from the top of the donut to begin a French braid, incorporating hair only from the top side as you circle around the donut.
- Once all hair is incorporated, finish with a regular braid, loosen the braid slightly for fullness, wrap it around the base, and pin securely. Finish with hairspray.
Tips for Success
- Practice the French braid technique on its own first if you’re new to it. Smaller sections create a more defined, intricate look.
- Keep the braid snug against the scalp for a polished finish, but loosen it slightly after securing for a romantic, textured vibe.
- For fine or thin hair, use a donut or clip-in extensions at the crown for added volume.
- For thick or long hair, the style holds especially well and looks dramatic.
- Sleep on it or wear it to the gym—the high placement and braid keep it secure.
- To make it messier and more casual, pull out a few face-framing pieces and gently expand the braid loops.
Why This Style Works So WellIt frames the face beautifully, elongates the neck, and works with almost any outfit or occasion. The upward direction of the braid draws the eye upward, creating a flattering lift. It’s also heatless and relatively quick once mastered (5–10 minutes).Try this French braid into high bun the next time you want an effortless yet elevated look. With a little practice, it will become one of your go-to updos. Enjoy styling!

Wow, this tutorial is so clear and easy to follow! I’ve always struggled with French braids, but the upside-down method you explained makes so much sense. The step-by-step photos and tips (especially about loosening the braid for a fuller look) are super helpful. I tried it this morning and it turned out really elegant — perfect for both casual days and special occasions. Thank you for sharing such a detailed and beautiful hairstyle guide!